
Zotero ist eine fantastische Literaturverwaltung. Bisher allerdings nur für Windows, Linux und den Mac. iPad-Nutzer:innen gingen leer aus. Jetzt gibt es eine Beta-Version für Apples Tablet und ich hab sie mir einmal angeschaut.
(mehr …)Kategorie: Apps
-

Organize notes in Obsidian – my workflow
Organizing notes in Obsidian is certainly possible thanks to folders and hashtags. However, I wanted to take a different approach and rely on a mixture of tables of contents (or maps of content), tag pages, and very classic folders. A detailed overview of my file structure in Obsidian
For about a year now, I can’t imagine my daily work without Obsidian. In the beginning, I was just looking for a home for my Zettelkasten, but in the meantime I write everything from quick notes to diary entries to scientific papers in Obsidian. And sometime last year I realized that it would no longer be enough to treat Obsidian like a Zettelkasten. Because it wasn’t (just) that anymore.
Sure; if I only kept notes and fragments of knowledge in Obsidian, there would be no need for structuring beyond tags or the like. But I use Obsidian every day for my normal work and for that I need quick access to all notes and texts from the project I’m working on. If I had to use search every time to find the summary of a meeting, for example, I could stop working right now – I simply wouldn’t get anything done. So I had to find a system to structure the different types of text in Obsidian and make them quickly accessible. I decided on a mixed system of tags, folders and maps of content.
Folders for different types of notes
The first organizing principle is folders, but they are filled very disproportionately. The background is that I do not use thematic folders, but divide them by note types (with one exception). The following folders are currently in use:
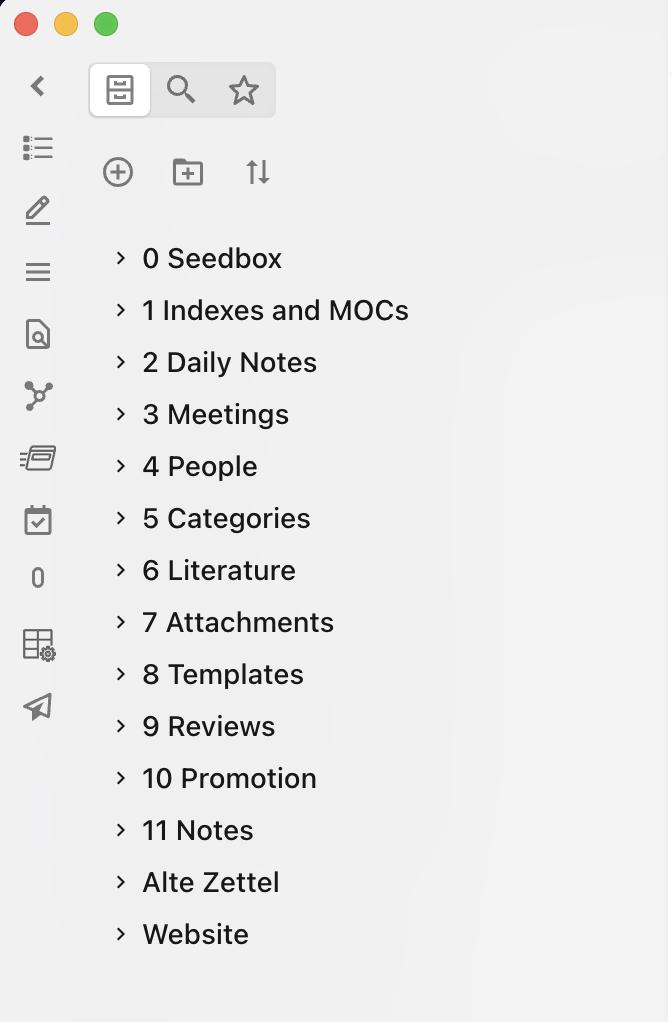
My folders in Obsidian 0 [Seedbox][1] is my inbox. New notes end up there first, whether I create them in Obsidian or import them from another app. Extracted notes from Zotero consequently end up there as well. I often leave notes there that I’m working on. I usually take a closer look once a week and decide which notes get moved to 11 Notes as permanent notes, what can be deleted and what stays there for now. With that, we’ve already anticipated the second folder: 11 Notes contains the absolute bulk of my notes, as it’s the place for all content notes I want to keep – regardless of the topic. Classic Zettelkasten notes are there as well as texts I wrote for the blog or drafts of scientific publications.
1 Indexes and MOCs contains the already mentioned Maps of Content which I will discuss in the next section.
2 Daily Notes contains my daily notes, which I use as a kind of diary. I usually capture there what I did during the day, what I was happy with and what I was not. I find this kind of reflection to be an extremely valuable part of trying to continually improve myself.
3 Meetings contains meeting notes that I want to keep separate so that I can quickly get to a specific meeting if I need to review something. I have also created a template for meetings, so that my meeting notes are always structured according to the same scheme. Together with the [Templater Plugin][2] I can create a meeting note in no time and focus on the content.
In 4 People there are notes about people. Especially for my PhD this is very valuable, because I often read the names of people that might be interesting later on. Interview partners sometimes give clues to other interesting people, or you meet someone at a conference, but you wouldn’t remember them after a few years.
The folders 5 Categories, 7 Attachments and 8 Templates are quickly told: In the first one are my category notes. Pretty much every note gets a category according to the scheme @category. For example, a note about a book gets @book. A podcast gets @podcast. But I also use categories like @PhD or @PapierlosStudieren. I use the @ sign only so that I can see the category at first glance and so that it stands out better from other tags. For me, categories are just tag pages, which I will discuss below.
7 Attachments is then simply my folder for all attachments (images and PDFs) and 8 Templates holds – not surprisingly – templates for notes.
My PhD folder as an exception
What remains? 6 Literature, 9 Reviews, 10 PhD and Old notes. Maybe starting directly at the end: In Old Notes are leftovers from an older system, which I still haven’t integrated completely. A bit like the last moving box, which still stands in the corner half a year after moving into the new apartment. But one day it will be unpacked, eventually.
In 6 Literature there are literature notes. These are often quotes or marked parts of texts that I imported to Obsidian to write new notes with them. How I do that, I have described in detail [here][3]. I have a separate folder for it, because it’s often not my own thoughts, but what I find exciting in other people‘ s work. To separate both, I use different folders. There are also resumés for books I’ve read. Every book I read gets a little résumé in which I briefly note what it was about and what I thought of it.
There is not much in the ninth folder yet. In principle, however, annual reviews or reflections on my [annual theme][4] end up there. All the reflections I do in regular intervals to think about whether I’m still on the right path (for me).
10 PhD is then the only exception, as there is not a specific kind of note in here, but everything (content-wise) related to my dissertation. As much as I like to use tags and search, I also like to click through folders from time to time and with such an important and at the same time extensive project as my dissertation, I wanted to have a place where everything can be found. Hence this folder, which doesn’t fit into the system, but gives me peace of mind as I have a very specific place to go for all my thoughts, notes and texts on my PhD project. I can still use tags and search, so I don’t lose anything.
Quick accesses and Maps of Content
So much, then, for my basic folder structure, which still doesn’t do that much with actual content notes. Here I use tables of contents, also called Maps of Content in the English-language discussion. These are located in the appropriate folder (see above). I have created these maps of content on different hierarchical levels. At the top is my index, where I link all other MOCs. So to speak a table of contents for tables of contents.
Then there are the actual MOCs, each representing a large area of my life. For example, I have one for everything related to my work as a social scientist or one for my freelance work as a writer and blogger. In another, I link my mini-reviews that I write for each book I read. Within these MOCs, individual project MOCs or individual notes can then be linked. Here I just decide based on what feels useful to me. Often this comes with working as well. I’m working on a project and I always need that one note, so I end up just linking it in the appropriate MOC. Also, MOCs are very helpful for me to clear my mind. I don’t like having to rely solely on search, and that’s where MOCs give me the ability to create a clickable collection of all project components.
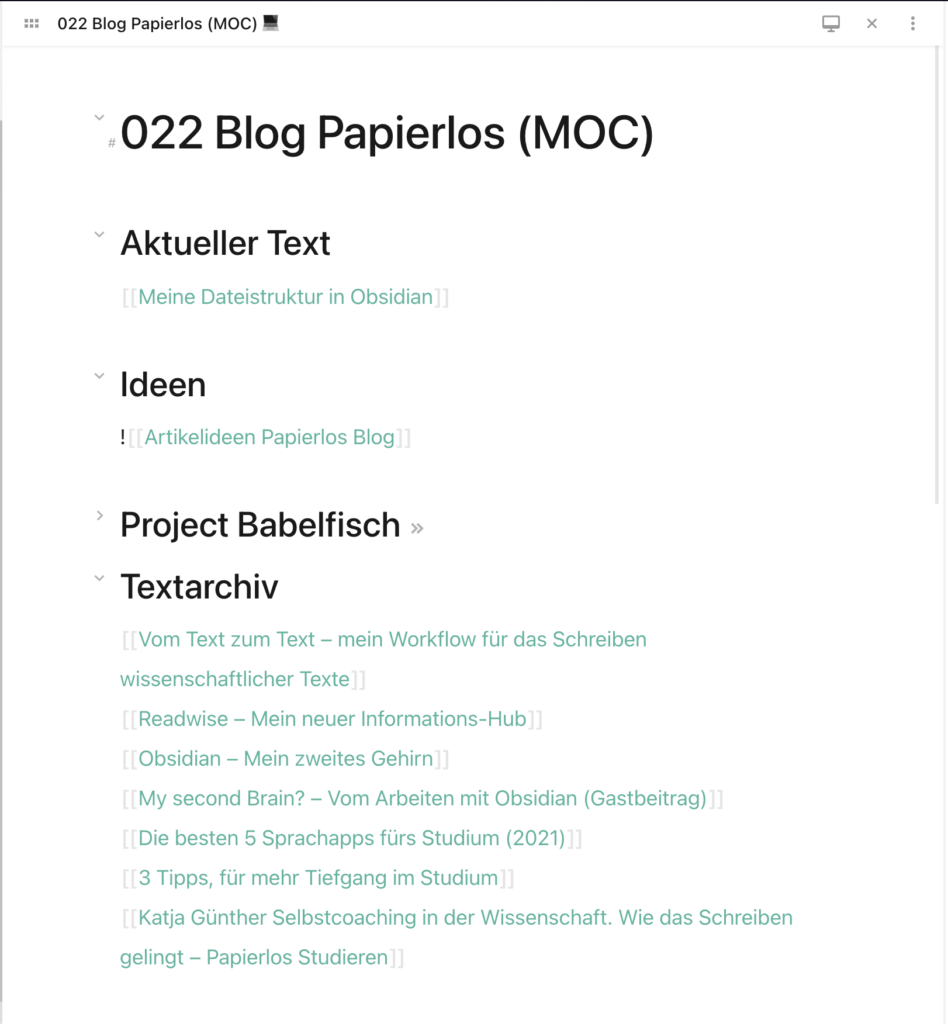
An example from my MOC for the blog 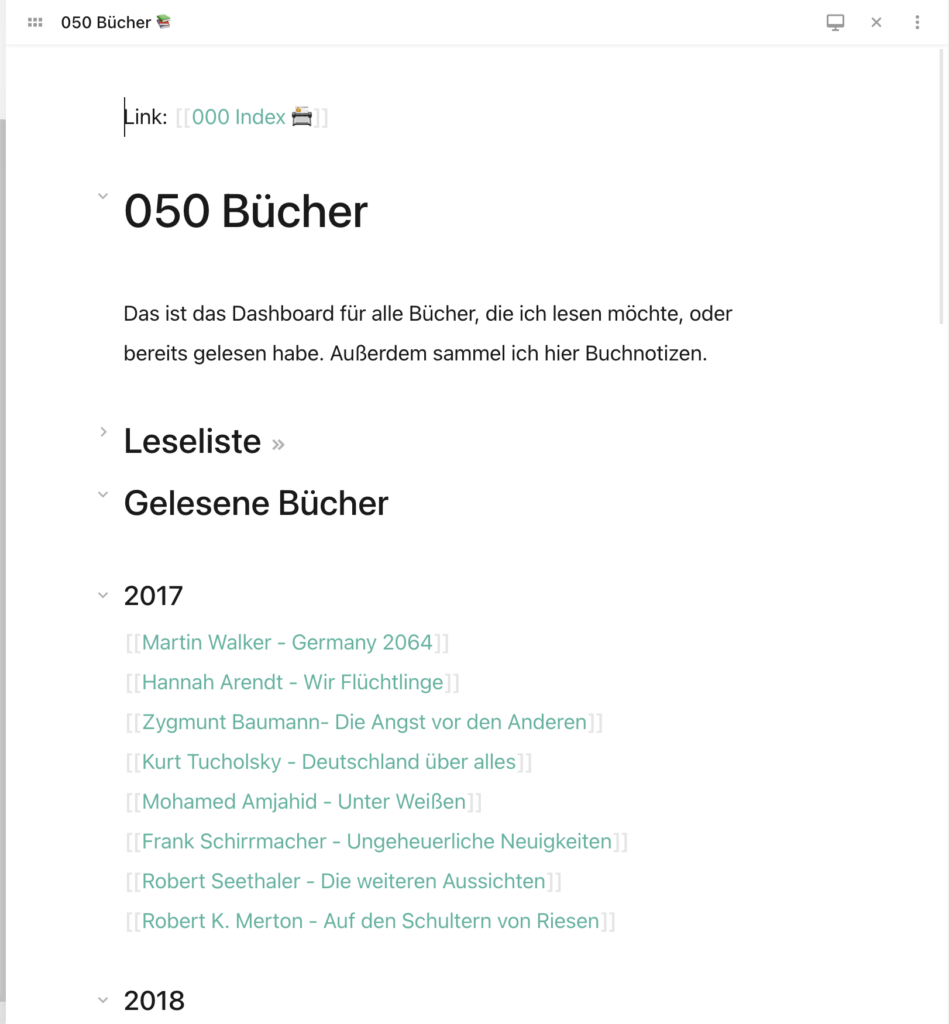
and my books MOC, where I link short reviews of books I read And then there are the pinned notes that Obsidian itself provides. Here, notes can be pinned with a keyboard shortcut and quickly retrieved. I find this very helpful, because I can pin everything I need regularly, including MOCs and searches! Currently I have there
- pinned my most important MOCs (Index, Academia, my old project I worked for until the end of 2020 and my PhD MOC),
- a note containing article ideas for the blog,
- a help note with the color codes I use to mark up PDFs,
- a search for all notes that have something to do with my [newsletter][5]
- and this article.
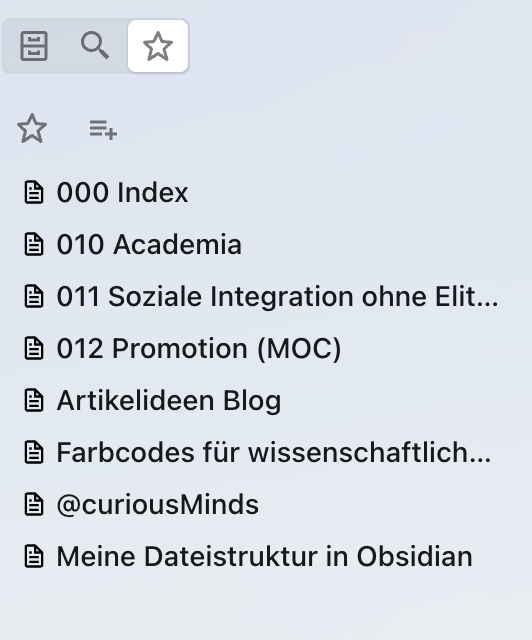
My current pinned notes and searches Topic pages instead of tags
The last thing that remains is how I connect pages with similar topics. Many will resort to tags (i.e. #) here, as you know it from Twitter. I usually don’t do that, but use topic pages. To do this, I simply create a [[topic page]] and link to it at the end of the note. A note about academic writing would then have e.g. [[academicWriting]] linked. This has the advantage that I create keywords over time that work like pages. So I can quickly see all the notes that have been linked to that topic page via backlinks. Also, I can potentially expand topic pages into „real“ notes simply by writing in the still empty note. I can’t do that with hashtags.
Combining structure and flexibility
Obsidian does not provide structure. This is both a curse and a blessing. At the beginning, I still thought that the search and the Knowledge Graph would be completely sufficient for me. However, from the moment I started using Obsidian for my daily work, I quickly reached its limits. I simply lacked quick access and overviews so that I didn’t have to search for a note every time I was in a meeting, for example. With the combination of topic pages, pinned notes, folders and maps of content, I now feel like I have enough structure in Obsidian to not panic every time I can’t find a note.
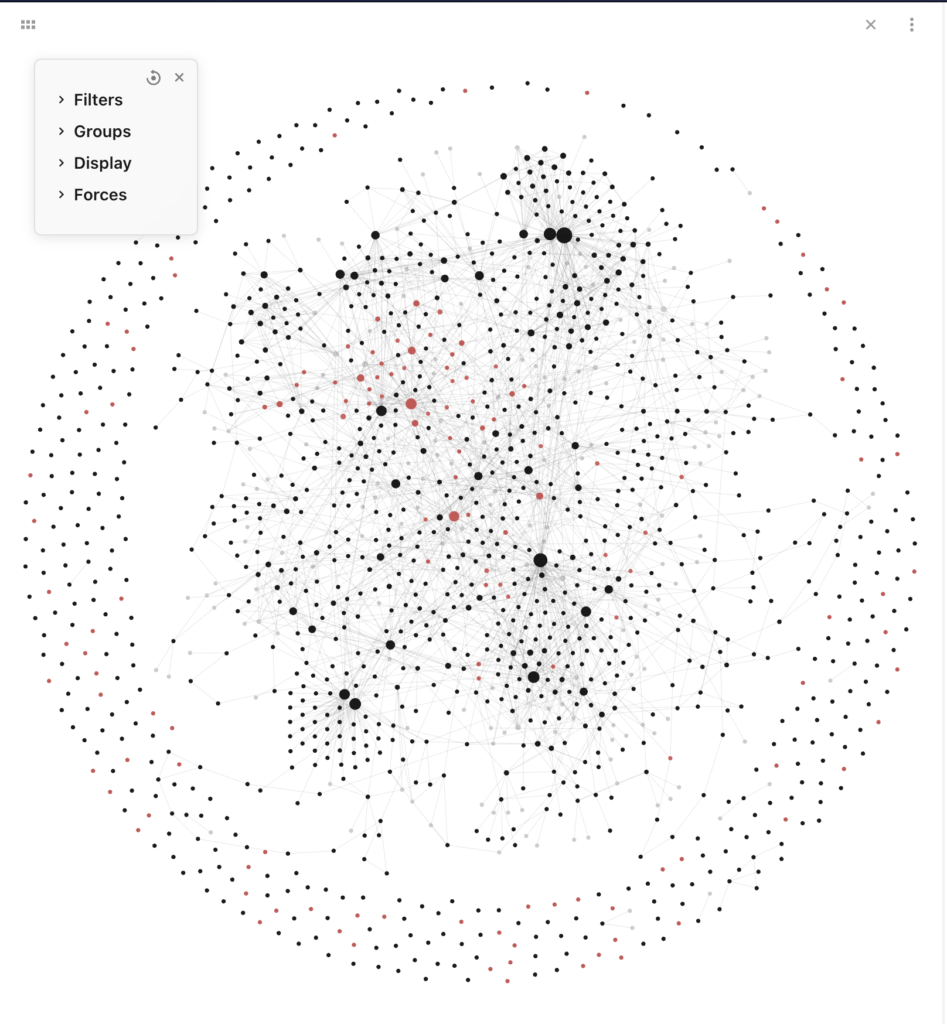
My constantly growing Knowledge Graph At the same time, my content notes are still all in one folder, so I get the inherent benefits of Obsidian. With the Knowledge Graph, I can still drift and roam associatively through my knowledge base in a beautiful way. Obsidian’s great strength (among others) is precisely this flexibility. I can easily adapt it to my preferences and working conditions. On the other hand, it also increases the barrier to entry, since you really have to think about what you want and need. For me, though, it was more than worth it.
-
Notizen organisieren in Obsidian – mein Workflow
Notizen in Obsidian zu organisieren ist dank Ordnern und Hashtags durchaus möglich. Ich wollte aber einen anderen Ansatz und setze auf eine Mischung aus Inhaltsverzeichnissen (oder auch Maps of Content), Tag-Seiten und ganz klassischen Ordnern. Eine detaillierte Übersicht meiner Dateistruktur in Obsidian
(mehr …) -

Die besten 5 Sprachapps fürs Studium (2021)
Mehr Sprachen sprechen, wer will das nicht? Mittlerweile gibt es eine kaum noch zu übersehende Vielzahl an Sprachapps, die beim Lernen unterstützen sollen. Unser Gastautor Patrick Breitenstein hat sich die fünf besten einmal angesehen.
(mehr …) -

»My second Brain«?: Vom Arbeiten mit Obsidian
Wie schlägt sich Obsidian, wenn man nicht nur ein bisschen mit dem Knowledge Graph spielen, sondern den kompletten Arbeitsalltag als Wissenschaftlerin damit bestreiten möchte? Die Erziehungswissenschaftlerin Lilli Riettiens berichtet hier von ihren Erfahrungen.
(mehr …) -

How to backup your GoodNotes files
GoodNotes has a built-in backup function. This article gives a short tutorial on how to use it.
(mehr …) -
Backups in GoodNotes
GoodNotes hat eine eingebaute Backup-Funktion. Dieser Artikel gibt eine kurze Anleitung, wie sie zu benutzen ist.
(mehr …) -

Eigene Widgets mit Widgetsmith (iOS 14)
Widgetsmith war die Überraschung im App Store 2020. Vom Indie-Entwickler David Smith als Möglichkeit für Power-User*innen gedacht, ging die App viral und war über Tage und Wochen die Nummer 1 in Apples App Store. Was für ein Erfolg! Dieses kurze How-to gibt eine Anleitung, um alles aus der App herauszuholen und den eigenen Homescreen zu individualisieren.
0. Erlaubnisse erteilen und Mitgliedschaft
Bevor es los gehen kann, sollte man in die Einstellungen gehen und dort auf den Punkt Manage Permissions klicken, um der App Rechte einzuräumen, ohne die sie nicht funktioniert. Dazu gehören u.a. der Zugriff auf den Kalender oder den eigenen Standort.
Der zweite Punkt ist die kostenpflichtige Mitgliedschaft, die man für Wetter- und Gezeiten-Widgets benötigt. Der Hintergrund ist einfach: Wetterdaten kosten Geld, ergo muss man auch dafür bezahlen, wenn man sie in einem Widget nutzen möchte. Bezahlt man direkt für ein gesamtes Jahr, kostet das ganze aktuell 21,99 €.

In den Einstellungen findet man… 
sowohl die Abo-Seite.. 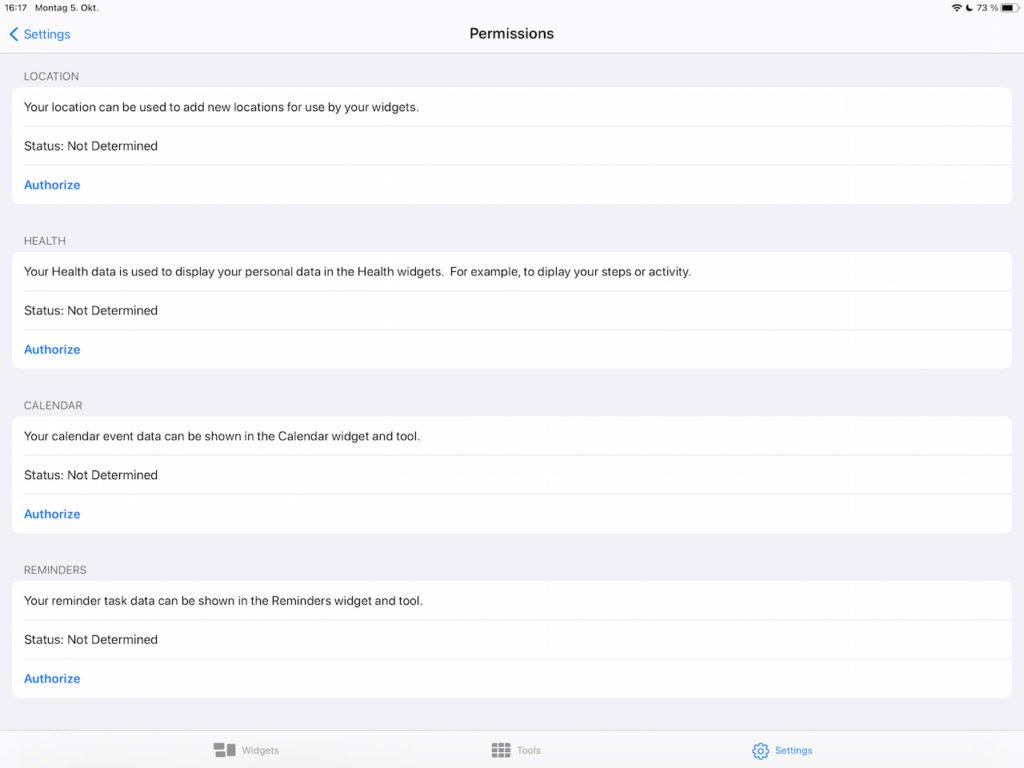
als auch die Möglichkeit, der App die nötigen Rechte zu gewähren
1. Widget-Größe wählen
Wie groß soll das gewünschte Widget sein? Small entspricht dabei vier App-Icons, Medium sind acht Icons und Large sechzehn. Für das Beispiel nehme ich im folgenden ein Medium-Widget.
2. Das Widget umbenennen
Um das Widget anzupassen, muss man nur drauftippen. Dann öffnet sich der Konfigurator. Hier lässt sich oben in der Mitte der Name ändern. Im Beispiel heißt es noch Medium #1, später ändere ich den Namen zu Kalender Mittel. Die Möglichkeit Add a Timed Widget greife ich ganz unten noch auf.

3. Das Widget konfigurieren
Jetzt kommt der eigentlich spannende Punkt. Tippt man erneut auf das Widget, öffnet sich der Konfigurator. Hier lässt sich das Widget ganz nach Belieben anpassen.
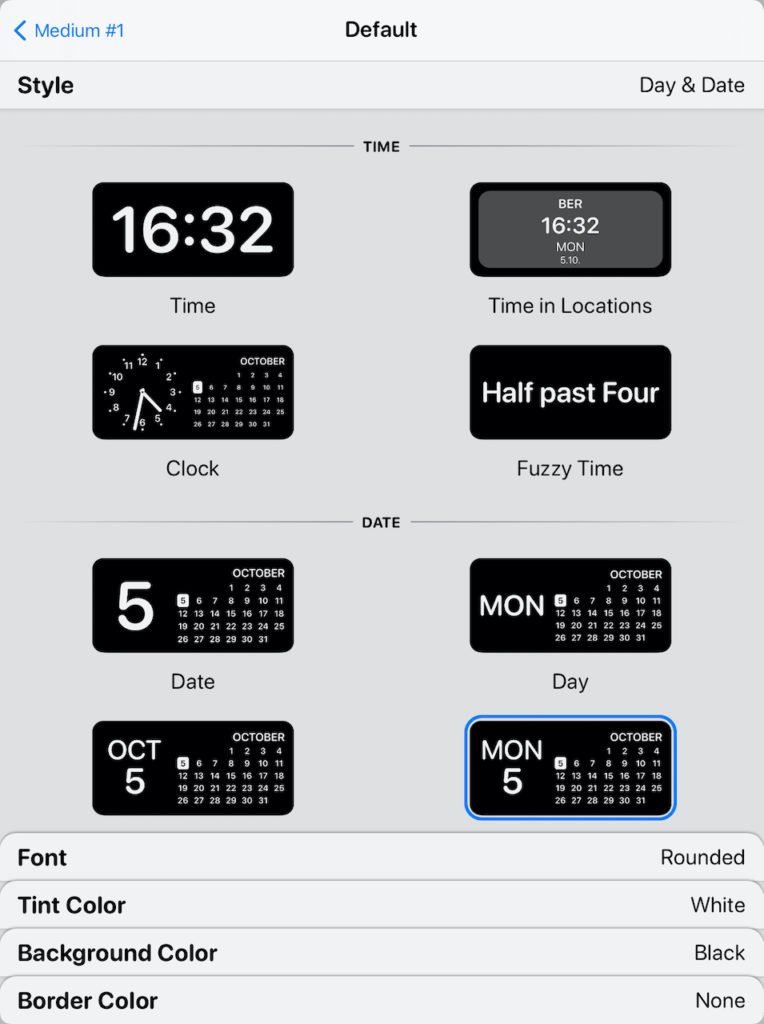
Zunächst muss man die gewünschte Kategorie festlegen. Hier hat man die Wahl zwischen Uhrzeit, Datum/Kalender, Foto/Text, Termine, Erinnerungen, Wetter, Gesundheit/Aktivität (funktioniert nur auf dem iPhone), Gezeiten, sowie Astronomie.
Hat man so den Inhalt des Widgets bestimmt, kann man sich in der Folge ums Aussehen kümmern. Hier kann man die Schriftart, Schriftfarbe, Hintergrundfarbe des Widgets und die Farbe der Widget-Umrandung bestimmen. Bei 35 verschiedenen Widgetarten, 13 Schriftarten, 14 Schriftfarben, 30 Hintergrundfarben und 15 Umrandungsfarben sind wir bei exakt 2.866.500 Kombinationsmöglichkeiten. Man sollte also am besten eine gewissen Vorstellung mitbringen, wie das Widget am Ende aussehen soll.
Hat man das Widget konfiguriert, kann man zum vorherigen Screen zurückgehen und auf Save klicken. Nun steht das Widget zur Verfügung.
4. Das Widget auf den Homescreen bringen
Hier möchte ich auf eine Anleitung verweisen(das How-To befindet sich ganz unten), die ich für einen Artikel geschrieben habe und die erklärt, wie man Widgets generell zum Homescreen hinzufügt.
Da Widgetsmith aber so viele Widgets zur Verfügung stellen kann, gibt es hier eine Besonderheit. Normalerweise werden in der Auswahl-Ansicht einer App alle Widgets angezeigt, die die App bietet. Dies ist bei Widgetsmith nicht möglich, da es theoretisch unbegrenzt viele sein können. Stattdessen zeigt die App nur die drei Größen (Small, Medium, Large) an. Im Beispiel klicke ich daher auf Medium und da ich nur ein einziges Widgetsmith-Widget der Größe Medium habe, wird auch sofort das richtige hinzugefügt. Sobald ich aber mehrere der selben Größe konfiguert habe, muss ich in einem letzten Schritt, wieder den Wackel-Modus aktivieren und dann auf das eben hinzugefügte Widget klicken, um an die Widget-Einstellungen zu kommen. Dort lässt sich dann das gewünschte Widget auswählen.
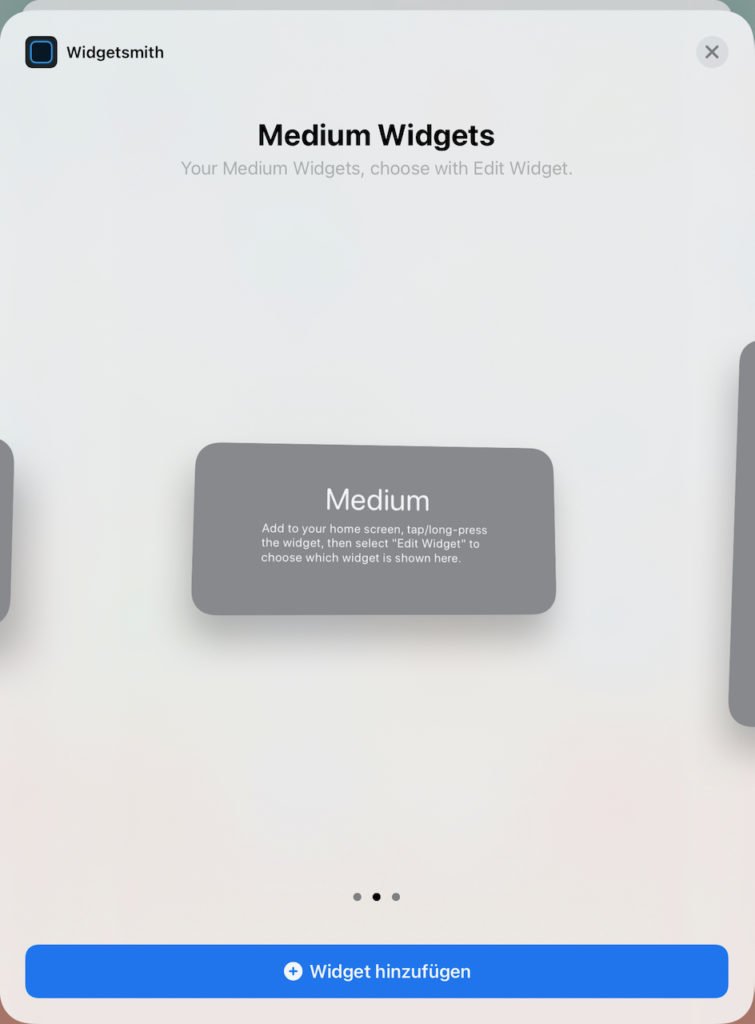
Zunächst muss die Größe gewählt werden, 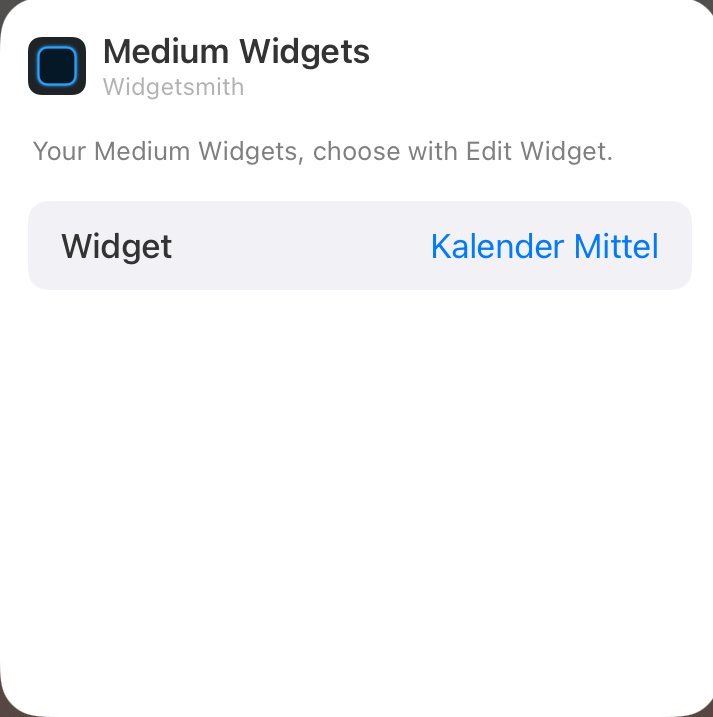
dann das konkrete Widget
(5. Timed Widgets)
Timed Widgets sind eine Option für Power-User*innen oder solche, die sich einfach nicht entscheiden können, welche Widgets sie angezeigt bekommen wollen. Die Idee dabei ist, zu verschiedenen Tageszeiten automatisch unterschiedliche Widgets angezeigt zu bekommen. Morgens z.B. ein motivierendes Zitat, tagsüber dann den Kalender und abends ein Wetter-Widget, um die richtigen Klamotten für den nächsten Tag raus zu legen.
Dabei geht man so vor, dass man immer vom gerade ausgewählten Widget ausgeht – das ist der Standard. Auf der eingeblendeten Uhr kann man dann die Intervalle einstellen, in denen ein anderes Widget angezeigt werden soll.
Um ein weiteres Widget hinzuzufügen, reicht ein Tippen auf das Plus-Symbol in der Mitte. Allerdings müssen Widgets hier neu erstellt werden. Schon existierende Widgets lassen sich nicht hinzufügen.

Titelbild: Bild: Cross Forward Consulting, LLC
-

Von der Aufnahme zur Analyse – f4transkript und f4analyse vorgestellt
Gerade in den Sozial- und Kulturwissenschaften ist f4 ein bekannter Name. Dieser Artikel schaut sich f4transkript, f4x und f4analyse genauer an.
(mehr …) -

GoodNotes Update: Gemeinsam an Dokumenten arbeiten
Die letzten Monate haben uns allen deutlich gemacht, wie wichtig gute Tools zum gemeinsamen Arbeiten über Distanzen hinweg sind. Wie praktisch, dass meine Lieblingsnotizenapp GoodNotes da gestern Version 5.5 veröffentlicht und ein entsprechendes Feature eingeführt hat.
(mehr …)